
You’ve decided that you want to take a road trip around Namibia. While planning, it is important to take into account the challenges that come with driving in Namibia. Undertaking a self-drive tour of Namibia is not the same as jumping in your car for a weekend trip. There are both considerations with the driving itself and skills that you should have before going on an extended road trip in a sparsely populated country .
This guide will prepare you for what to expect when driving in Namibia. It will introduce the driving skills you’ll need and road conditions you’ll face, as well as offering specific advice to ensure your time on the road goes as smoothly as possible.
What’s Included:
The Basics of Driving in Namibia
There are a few basic things to know about driving in Namibia, which may impact how you plan your trip.
- Namibians drive on the left side of the road. If you regularly drive on the right side of the road, this may seem daunting. Don’t be overwhelmed. Even for less confident drivers, driving on the opposite side of the road will come naturally after just an hour in the car. In both manual and automatic vehicles, your gears and pedals are in the same order. However, the turn signal and wiper control sticks are reversed.
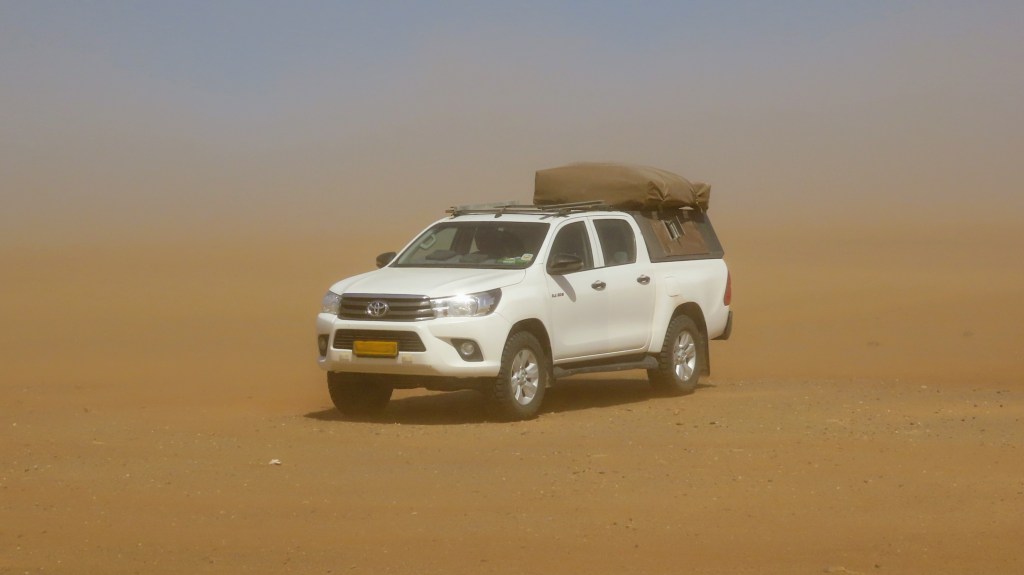
- The majority of roads in Namibia are gravel, including many major roads between must-see destinations. Be aware that gravel roads can be corrugated, have potholes and undergo abrupt changes in road quality. Gravel roads do not mean that you need a 4×4 to get around. In fact, many of Namibia’s gravel roads are as smooth as tarred roads and extremely well marked. How road conditions may impact your planning is discussed below.
- There are certain roads and areas in Namibia that are inaccessible without a 4×4. If you are not planning to rent a 4×4 vehicle, or simply don’t want to attempt any off-road driving, you may need to do some additional planning to determine how you will reach and see certain sites.
- Gas stations are few and far between. Major cities will have gas stations, and Namibia Wildlife Resorts (NWR) lodges within national parks commonly have a gas pump as well. However, in Namibia it is easy to travel 500km without passing through a major city and before reaching an NWR camp. Plan how far you will be traveling each day and where you can stop for gas. Most 4×4 rental vehicles come with extended gas tanks, which double the distance that you can travel as compared to a standard gas tank.

General Car Skills
Although anyone with a driver’s license can technically do a road trip through Namibia, there are some car skills that we think are essential for driving-heavy trips like this. Your car rental company may briefly explain some of these when you pick up your car. But if you are not already familiar with these skills, they all can be practiced at home on your own car or learned through online tutorials (linked below).
- Know how to change a tire. You will come across roads and off-road tracks where puncturing a tire is a real threat. To avoid this, make sure your tires are properly inflated and drive over rocky roads slowly (40kph or less). If you do need to change a tire, your rental company should provide you with an extra tire, and may provide you with as many as three. Familiarize yourself with how to jack up your car, remove a tire, and replace it. Different cars come with different car jack types and different car jack placements. Ask your rental company where your car jack is located and how to use it.
- Understand how and why to inflate and deflate your tires. In Namibia, the most common case for deflating your tires is to drive the sand track to Sossusvlei, after which you will need to reinflate your tires. If you change a tire, you also may need to adjust the new tire’s pressure so that it matches your other tires. If you rent a 4×4, your rental company should give you a mini air compressor for tire pressure adjustments. Understand how to use the air compressor and ask your rental company what tire pressure they recommend for driving in sand and for driving on tarred roads. Almost every car comes with recommended tire pressures, which are printed on a sticker affixed to the doorframe of the driver-side door.
- Know how to check the key liquid levels in your car. All fluids can all be found under the hood of your car and most are within semi-transparent plastic containers with minimum and maximum levels printed on the outside so that you can easily tell if you have enough. Checking your oil requires checking the markings on the dipstick. Before you leave your car rental agency, check all of your fluids, and if any are below the minimum level marked, ask your rental company to top them off.
During your trip check these fluids regularly as off-road and gravel road driving can cause damage to your vehicle that may cause leakages. If you find any levels drop too low, stop at a garage to have the fluid topped up. Afterwards, regularly recheck the levels to ensure your car is not leaking. After long stops, you can also check under the car to be sure no liquids are pooling from leaks in your car. If you do have a leak, contact your rental agency and ask them how to proceed.
Navigating
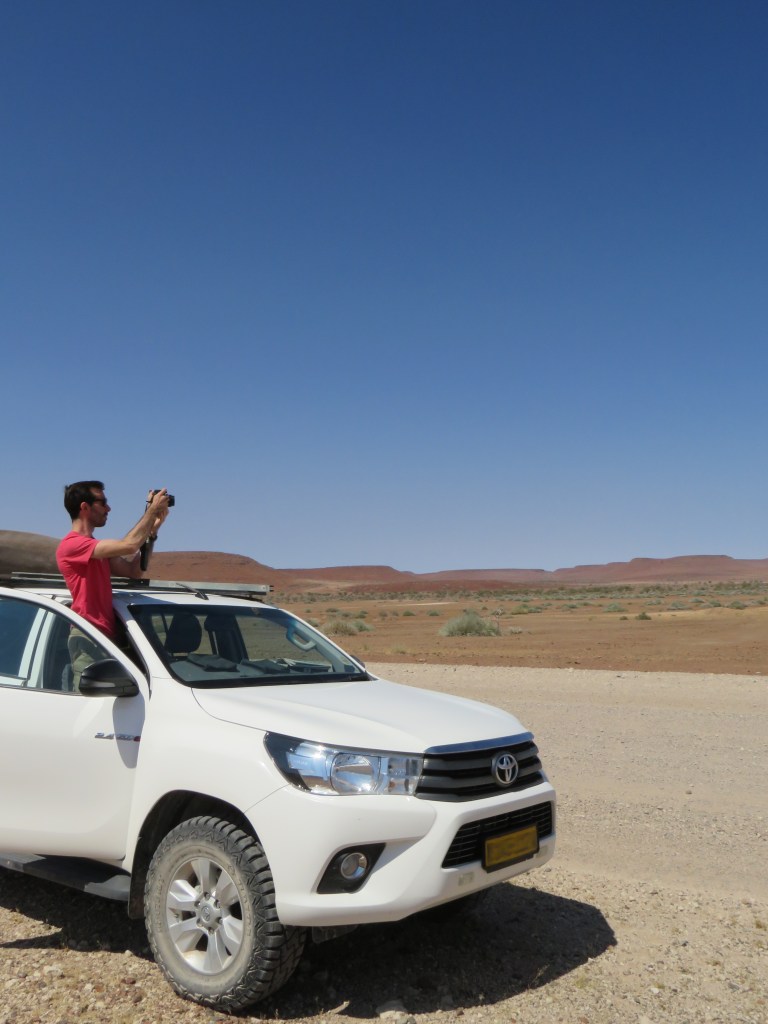
Navigating Namibia is the easiest part of your driving trip. Roads in Namibia, including minor ones, are very well marked, with plentiful and accurate signage. This means that you do not necessarily need to buy a GPS for your trip.
If you are planning extended off-road travel, you will want a GPS. Since we stuck mainly to top sights and marked roads, we found that a good map and a couple of detailed print outs from Google gave us plenty of information.
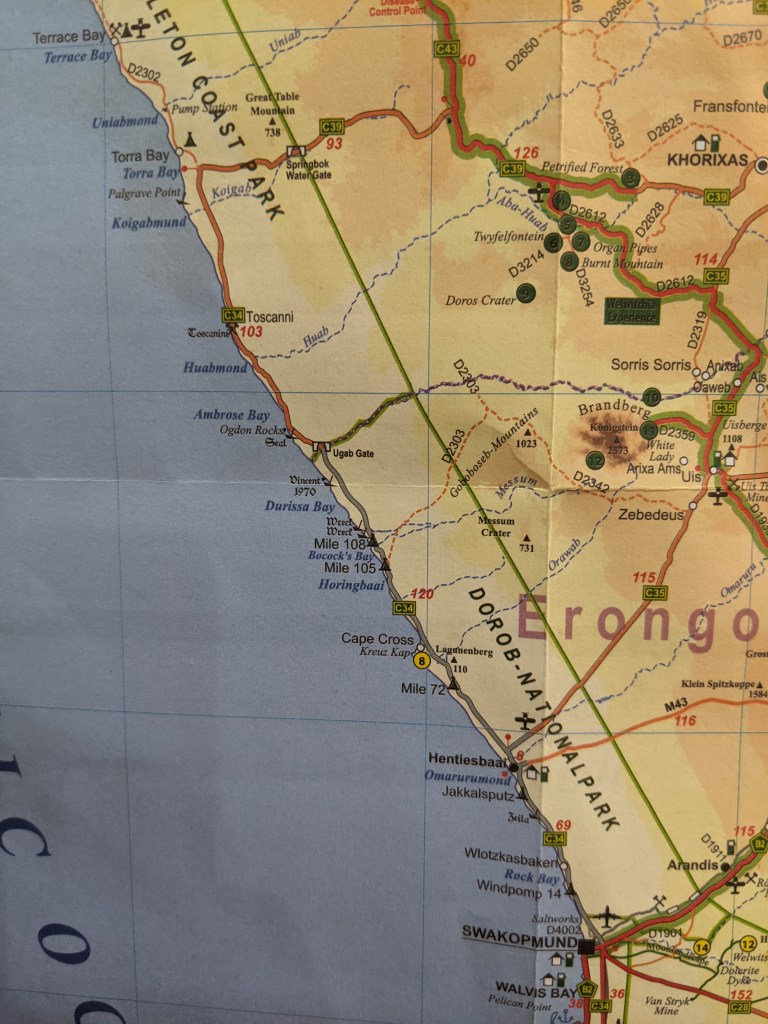
We highly recommend the Tracks4Africa Namibia map. This full-country roadmap covers all major and minor roads and highlights many attractions. Most importantly it has GPS-measured distance markings and expected road travel times based upon data gathered by real people who have driven the route. This map is useful both during your trip planning and on the road.
Unlike most of the world, Google and other map services provide you with highly inaccurate travel times between locations in Namibia. That’s because they only take into account speed limits and fail to take into account road conditions. Road condition plays a major factor in how quickly you can traverse a Namibian road, and this is where the Tracks4Africa map excels. We found that it was typically accurate within 10-15 minutes of the time indicated on the map. We highly recommend basing your itinerary off of the times you calculate from this map, not the times calculated by online mapping services. Planning the time it will take to get between locations will be very important for your trip because, if you are renting a car, you won’t be allowed to drive after sundown.
As a backup to a good roadmap, consider printing a few detailed maps off of Google, bringing a guidebook with additional detailed maps (like the Bradt Namibia Guide), and/or downloading an offline map app like Maps.me. Some specific detailed areas of Namibia are not well marked on the Tracks4Africa map, including waterholes in Etosha and the various routes on the Lüderitz peninsula (to name a few). Any and all of the three above backups will help guide you in these specific areas.
Specifically for navigating the Lüderitz peninsula, we recommend getting a copy of the color Lüderitz map available from the Nest Hotel (also available from some of the local tour operators). This detailed map exceeds the details available from Google Maps and the Bradt Namibia Guide, and includes all of the major stopping points on the peninsula and the off-road tracks.

Road Conditions
Because so many of Namibia’s roads are gravel, travel times on roads can vary greatly based upon the quality of the road. Gravel road quality also differs depending on the underlying terrain that was graded to make the road. Rockier areas have rockier roads, while sandier areas have sandier roads. Road quality also changes over time. Roads are constantly re-graded, and some major roads are in the process of being paved or expanded.
The following are our notes about road quality for each segment of our trip. These notes were taken in late August 2021 and will become outdated over time. But they provide useful context as to the type of roads you will encounter. These notes are presented in the order in which we drove the roads in our two-week Namibia Itinerary.
- The B1, north from Windhoek to Otjiwarongo, is well paved and well maintained. The road is in the process of being expanded from a one-lane road to a two-lane divided highway. The road starts as a two-lane divided highway and reduces to a one-lane road before Okahandja.
- The C38, north from Otjiwarongo to Okaukuejo is a well-paved and maintained one-lane road. Beyond the gate from Okaukuejo towards Halali, the C38 becomes a gravel road of reasonably good quality. However, be aware that travel times can be slower within Etosha due to the prevalence of wildlife in the road.
- The C39, west from Outjo to Khorixas, is a paved and lightly traveled one-lane road.
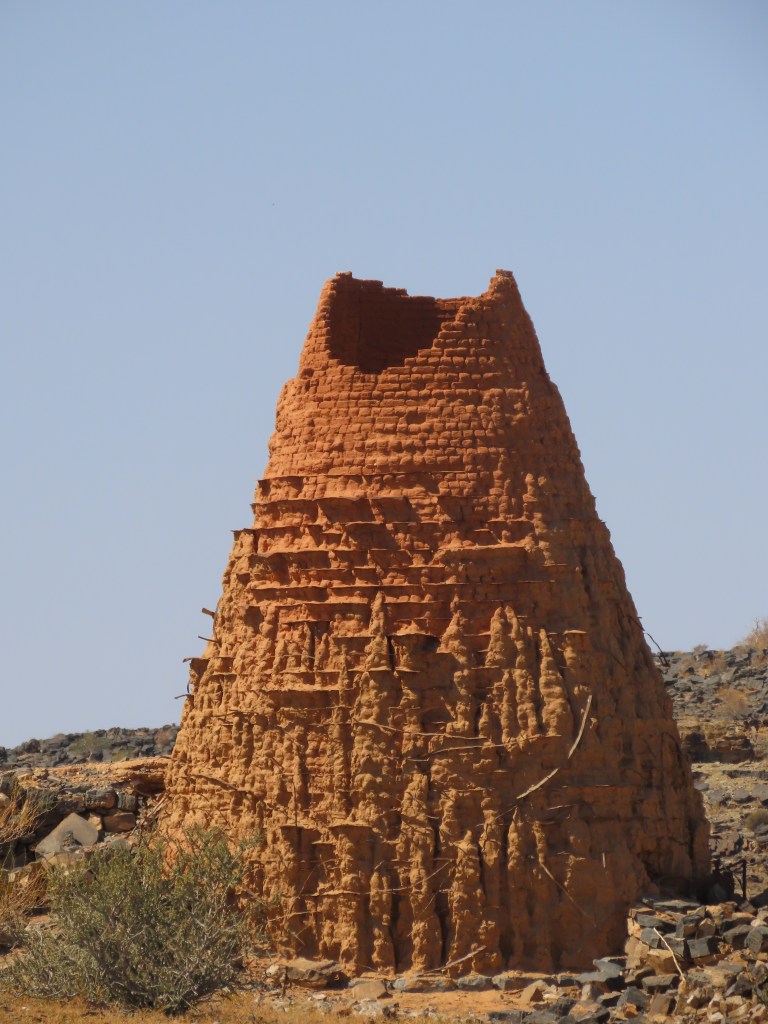
- The C39, to the west of Khorixas all the way to Torra Bay, and then C34, continuing up from Torra Bay to Terrace Bay, is a reasonably smooth dirt road turning into a mix of salt and gravel roads along the coast. Of particular note on this route is the incredibly varied landscape which, from Twyfelfontein, starts as mountains then changes into desert dunes then back into mountains and then into desolate stone desert as you approach the coast.
- The C34 south from Torra Bay to Swakopmund is very smooth. The road is a mix of gravel and salt, depending on the underlying terrain. The road becomes tarred just North of Henties Bay and appears to be quite new.
- The B2 between Swakopmund and Walvis Bay is a paved one-lane road that is likely to be one of the most trafficked roads you encounter.
- The C14, east from Walvis Bay to Solitaire is paved just past the Walvis Bay airport, at which point it becomes a corrugated and bumpy gravel route. This road will take more time than you expect until it is re-graded. The exception are the canyon passes (Kuiseb and Gaub), both of which are much smoother than the rest of the road.
- The C19, south from Solitaire to the D826 turnoff for Sesriem, is relatively smooth and can be traveled reasonably close to the advertised times on the Tracks4Africa map.
- The D826 from the C19 all the way into Sesriem camp and continuing all the way to Sossusvlei is a paved one-lane road. Note that within Sesriem campsite, the turn off for Sesriem canyon is a gravel road, just to the left inside of the gate. This road is as corrugated as a road can be while still technically being drivable. This four km stretch of road will test your suspension and nerves.
- The C27 from Sesriem to the D707 is good quality and can be passed through quickly. The quality is similar to the C39, though not quite as good as the C34.
- The D707 varies greatly in quality. It begins as a relatively smooth, though slightly rocky, gravel road and turns into a semi-sandy track that becomes increasingly rutted to the point that you may hit the bottom of your vehicle unless you are careful to drive above the ruts. After being rutted for several kilometers it slowly reverts back to semi-sandy and then to good-quality gravel.
- The C13 from the D707 to the B4 is a good quality gravel road.
- The B4, all the way from Lüderitz to Keetmanshoop, is a seemingly new one-lane paved highway.
- The C12, from the B4 to the D601, and the D601 to Hobas are high-quality gravel roads. These roads are nearly as smooth as the salt flat roads of the upper coast. The C12 does have multiple train track crossings, which are well marked.
- The B1, between Keetmanshoop and Windhoek, is a paved one-lane highway. The highway quality improves as you approach Windhoek, with the first stretch (to Mariental) being bumpy and poorly patched, the middle stretch (to Rehoboth) being better patched and not bumpy, and the final stretch (to Windhoek) being high quality.
Important Tips
Driving Namibia is well documented by blogs, reviews, and a few guidebooks. However, there are some key pieces of information that we struggled to find before our trip. We are sharing them here as they may have an impact on how you plan your trip.
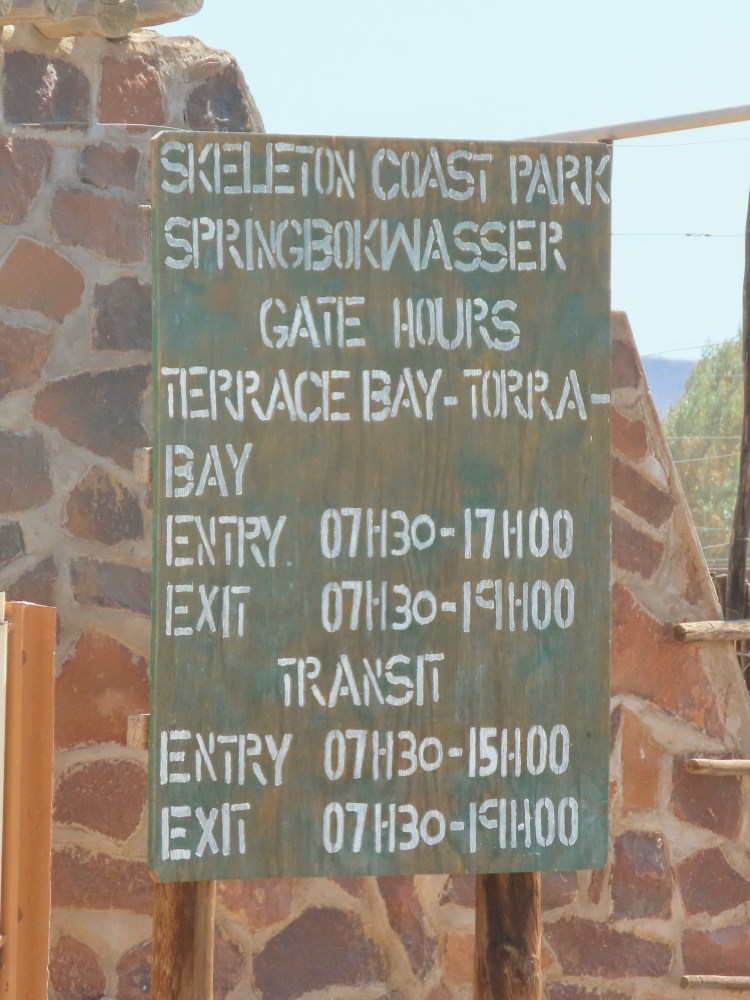
- When we planned our trip to Namibia, we wanted to enter the Skeleton Coast Park through the Springbokwasser Gate. This gate is remote, but the closest gate into the Skeleton Coast when coming from the direction of Etosha, which was where we were driving from to get to Terrace Bay.
Old information we found online indicated that the gate is open until 5:00pm if you have a reservation at Torra Bay or Terrace Bay. But both newer information and NWR representatives told us that the gate is only open until 3:00pm for all visitors, regardless if you’re staying in the park or not. We got to the gate just before 3:00pm, only to find out that it is in fact open until 5:00pm if you have a reservation at Terrace Bay or Torra Bay. The 2 hour difference is enough for you to add an additional Damaraland activity to your itinerary! This is confirmed by a new sign posted outside of the gate, and we confirmed it with the gatekeepers.
- Gas pumps located in cities and major towns reliably provide gas and can fill your tank reasonably quickly. However, gas pumps located in small towns and in national parks may not have gas, or may take a very long time to fill your tank because they run on local renewable power. The Tracks4Africa marks reliable and unreliable gas stations separately so you can better plan your trip. In particular, we found that the fill times at Namutoni (in Etosha) and at Terrace Bay were much slower than at other gas stations. Our 80 liter gas tank took approximately half an hour to fill. Note that at Terrace Bay, power turns off between 2:00pm and 5:00pm, including the power to the gas pump. If you plan to simply stop through Terrace Bay and fill up, don’t do it in the afternoon.
- If you’re not able, or don’t feel up to the challenge of driving the four km sand track to Deadvlei and Sossusvlei in the Namib-Naukluft Park, you can hire an NWR guide to drive you from the 2×4 parking lot located at the end of the paved road. These guides wait in the 2×4 parking area in 4×4 vehicles and wait for passengers to arrive. It costs 50 NAD for a one-way trip, which will take you first to the Deadvlei parking lot, and then a further kilometer to the Sossusvlei parking lot. Alternatively, the track to the Deadvlei parking lot can be hiked, but remember to bring water with you. We’ve heard that, if you attempt the drive and get stuck, the guides can be flagged down to help pull you out of the sand for approximately 50-100 NAD. However, driving the rest of the way back to the paved road will still be up to you.

One thought on “Namibia Self-Drive, Tips for a Successful Trip”